- Import reference texture, drag from finder into content box.
- Create material ( right click content box) and place reference texture onto material. (Left click and t)
- Drag material onto one side of the box, make the box size of the image (900 x 1290)
- Go into the material editor screen and create a bounding box based 0-1 UV W, then a component mask, then a custom rotator, hold down 1 and create a node and name it 0.75, plug it into the rotation angle, then plug the rotator into the texture sample (UV)
- Create BSP Cube
- Re-scale material reference to the size of the cube (Ball) (3.75,3.75,3.75)
- Create static mesh from BSP cube.
- Create another BSP Cube and scale it to the size of the paddle using the reference image (350, 100, 100)
- Then create a static mesh for the paddle.
- Create a new BSP cube for the boundary (150, 5100, 100)
- Line it up to the edge of the image, and create static mesh for the boundary.
- Create text render and scale the 0 to the 0 in the image.
- Hold alt to copy the score across and rename both p1 score and p2 score.
- Create folders to group everything together and stay organised. (In the content section of the screen)
- Create a new blueprint class (Pawn) name this paddle right or left.
- Double click on the blueprint to bring up the editor.
- Add component > Static Mesh > Rename paddle mesh
- Go to the static mesh tab in the editor (Right side) and click where it says none and change it to the paddle you made earlier, so now it should look like a paddle.
- Go to collisions in the editor and click it at the top of the screen so it is highlighted, then go to the top of the screen and click mesh > simplified box collision and hit save then go back to the editor.
- Turn off gravity and set the linear damping to 10.
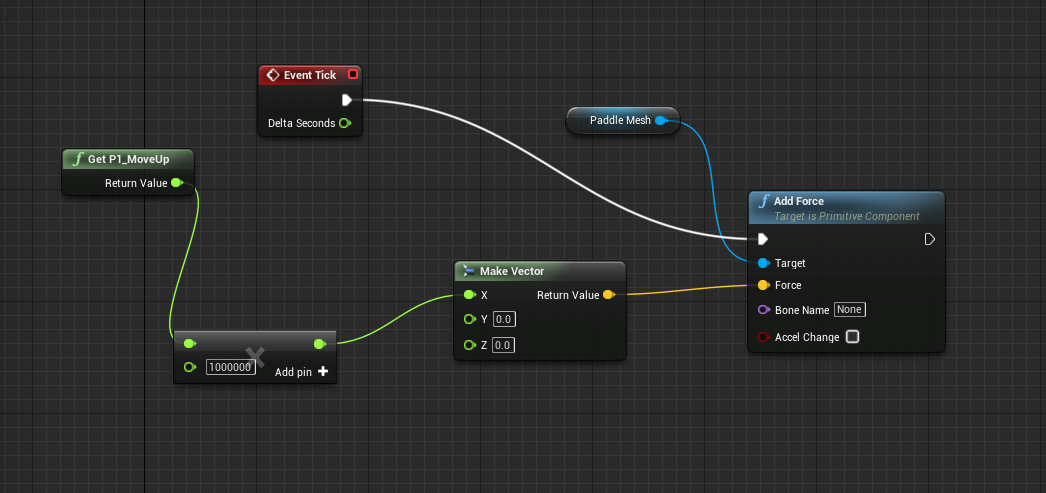
- Go project settings > Input > Axis mappings and create a key mapping called “P1_MoveUp” and bind up key to a positive value and down to a negative value.
- Then go into the editor, and set it up like this:
- Then we have to get a camera in, so go to search classes and find the camera and drag it into the scene.
- Then position it above the image so it looks above the level like so:

25. Then go to blueprints > level blueprints and setup the editor like this: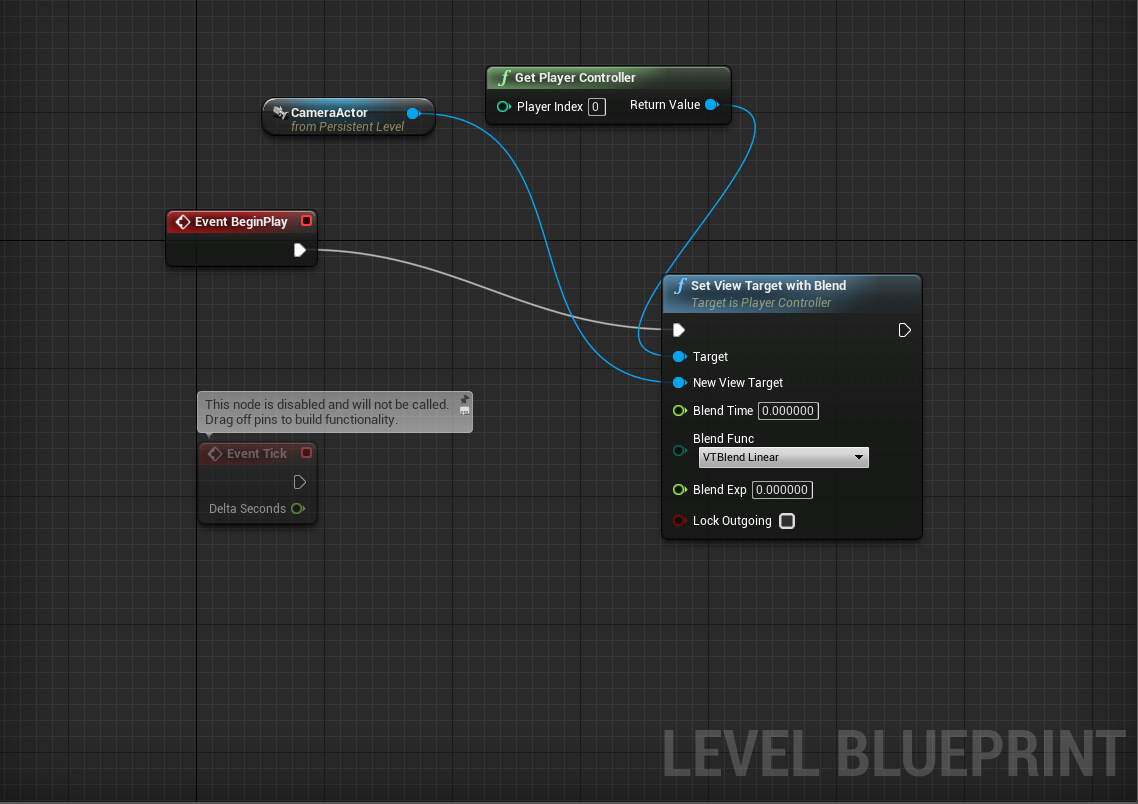
26.Then create a new material called unlit_white and double click on it to bring up the editor and then set it up so it looks like this: (Make sure the shading model is unlit)

27. Next apply this material to all of your static meshes in the game to make them white.
28. Next we must make the text white as we cannot see it very well in game. So click on the current material and go into the engine folders by clicking on the arrow next to the material.
29. Then make a copy of material and call it M_Pongtext.
30. Drag the duplicate into your materials folder and double click to get onto the editor and make sure it is setup as below.

31. Then apply this material to both of your letters by simply dragging it from the content folder into the material box of the text.
32. Create blueprints for the boundaries by going to the static mesh boundary right clicking > assets > create blueprint using this object.
33. Make sure collisions are enabled on the BP, then align it with the top and bottom of the level.
34. Make separate blueprints for goal left and goal right then align these too.